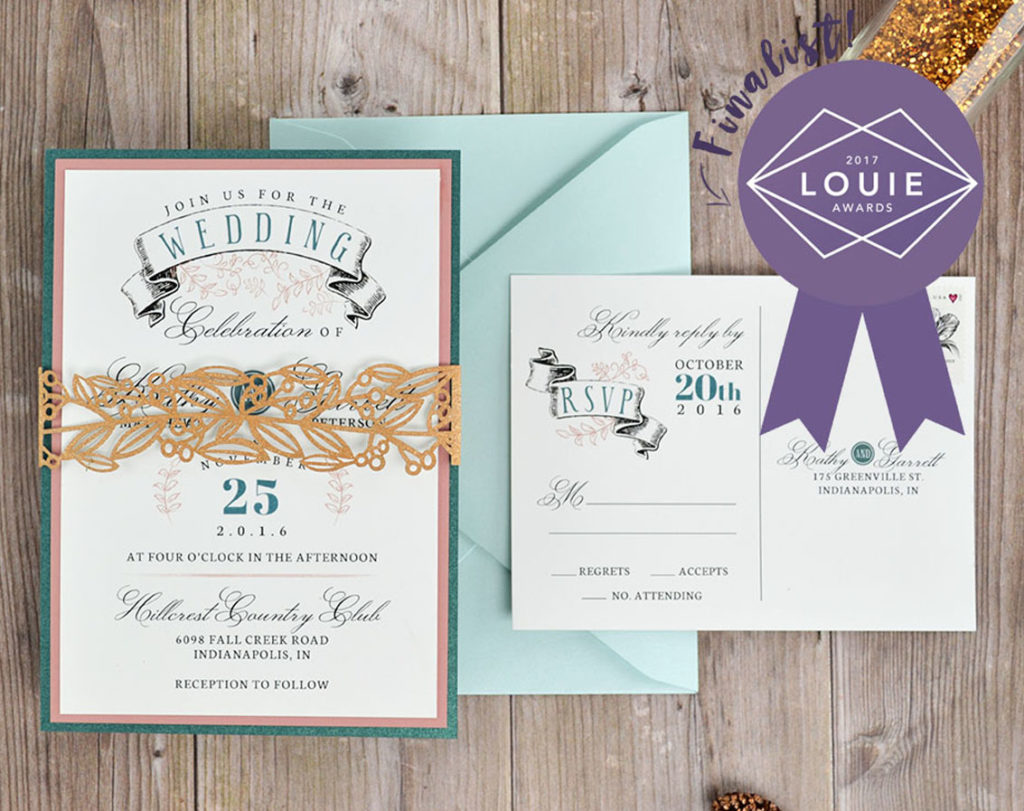
 Cards and Pockets is excited and honored to be a finalist in the 2017 LOUIE Awards! The LOUIE Awards is a program created by the Greeting Card Association in 1988 to celebrate the best cards of the industry. It’s even called the “Oscars of Greeting Cards.” 😉
This original C&P creation is a finalist for the 2017 LOUIE Awards in the category “General Invitations – $4 and Below,” but you can DIY this yourself for just $2.84 per invitation!
This invitation is simple, easy, and affordable to DIY, but does not fall short in elegance. It combines modern design elements, a pretty Dusty Rose, Jade, and Gold color palette, and a touch of glitter for one sweet suite. It features one of our free invitation templates mounted onto two different mats to achieve a simple layered look, with a laser-cut belly band to dress it up just the right amount.
![]()
- Free Invitation Template -“Banner”
- Pre-cut 4.5 x 6.5 Invitation Cards in Snow White – (25 pk for $5 // $.20 each)
- Pre-cut 3.5 x 5 RSVP card inserts in Snow White – (25 pk for $4 // $.16 each)
- 5×7 Panel Card in Jade – ($.30 each)
- A7 Style Invitation Mat in Dusty Rose – ($.22 each)
- A7 Euro flap Envelope in Aquamarine – ($.23 each)
- RSVP Euro flap Envelope in Soft Coral – ($.18 each)
- “Vines” Laser Belly Band in Glitter Gold – ($1.29 each)
DIY Total = $2.58 per Invitation
(Add $.50 for printing; you don’t need to order pre-cut inserts when you order printing for this invite + RSVP set)
Shop This Post
Steps to Create This Look:
Step 1.)
Customize, download, and resize this free invitation template. Print on your pre-cut inserts on your home printer (or you can upload the design to our Print Your Own section to have us print them for you).
Step 2.)
Mount the invitation card to the invitation mat. We recommend using Zip Dry Glue or a tape dispenser.
Step 3.)
Mount the invitation card with mat to your panel card.
Step 4.)
Take your belly band and center the laser design on the front of your invitation card, making sure it lies straight. Fold one side behind the invitation, and then line the other side up in the back before folding. The ends should meet up and overlap slightly. Secure with Zip Dry Glue, a Glue Dot, hot glue, or other adhesive.
Step 5.)
Tuck your RSVP card under the flap of your pre-addressed and stamped RSVP envelope, and carefully slide under the belly band. You can also tuck under the belly band on the back side of your invitation if you want all focus on your invite/belly band combo.

*This RSVP card template is a postcard design, so an RSVP envelope is not necessary unless you want to use one for more privacy. Simply stamp and address the RSVP card before assembling.
You’re ready to tuck the whole thing into your mailing envelope and send these pretties off to your guests!
It just goes to show that it is possible to DIY simple, yet beautiful wedding invitations on a budget. You can switch up the colors of all of the pieces to fit your wedding and create a completely new look that’s unique to you.
Happy DIY-ing!
Save on Pinterest for later:


