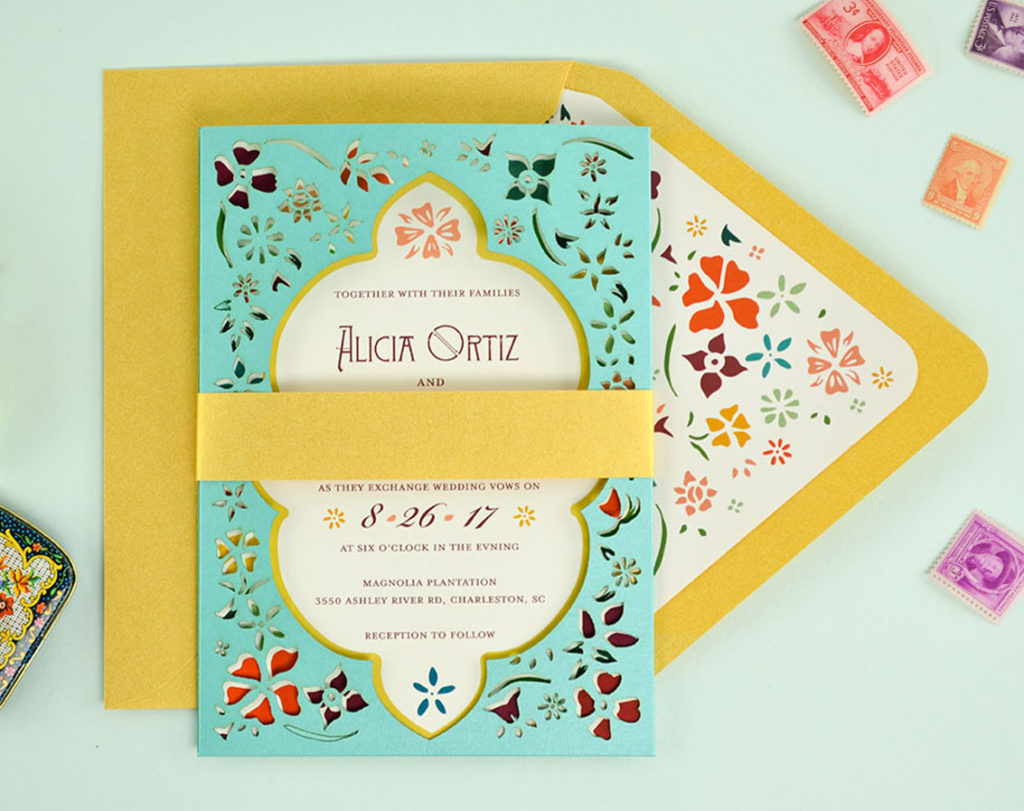
 Our “Flower Tin” invitation suite gets its name because its patterns are reminiscent of a vintage floral tin. This invitation combines bright, poppy colors with intricate laser cut elements and playful floral designs for a suite that’s full of retro flair and all about the little details.
![]()
- Free Invitation & RSVP Template – “Flower Tin”
- Pre-cut 5×7 Invitation Cards in Cream – (25 pk for $5 // $.20 each)
- Pre-cut A2 RSVP card inserts in Cream – (25 pk for $4.98 // $.20 each)
- “Flower Tin” Laser cut DYO Panel Pocket in Lagoon – ($1.29 each)
- Thin Belly band in Gold – (50 pk for $6.95 // $.14 each)
- A7.5 Euro flap Envelope in Gold – ($.27 each)
- A7.5 Graphic Envelope Liner – “Flower Tin” on Cream – ($.65 each)
- A2 Euro flap Envelope in Gold – ($.18 each)
DIY for $2.93 per Invitation
(Add printing for $.54 more; you can skip ordering the pre-cut inserts when you order printing for this invite + RSVP set)
Shop This Post
 How to Create This Look:
Step 1.)
Customize and download this free invitation template. Print on your pre-cut inserts on your home printer, or you can upload your customized design to our Print Your Own section to have us print them for you.
Step 2.)
Slide your invitation card into the laser pocket so that the design matches up with the opening and laser cut details.
Step 3.)
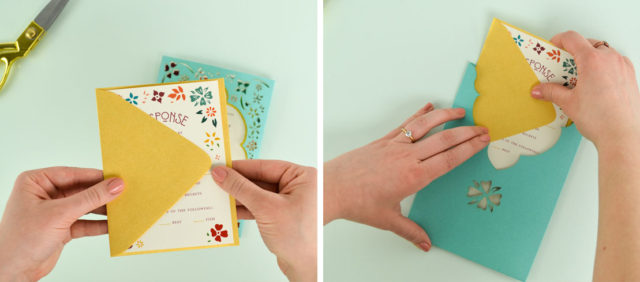
Tuck the RSVP card under the flap of your A2 envelope (which should already be addressed and stamped), and slide it into the laser sleeve behind the invitation, facing out.
Step 4.)
Lay the belly band on top of your invitation so that it’s straight and centered. Fold one side behind your invitation, then align the two ends on the back before folding the second side. The two ends should overlap slightly.
Step 5.)
Secure the belly band with Zip Dry Glue, a Glue Dot, or other adhesive.
Step 6.)
To line your envelope, use a tape dispenser or Zip Dry glue to put a line of adhesive just on the top half of the liner, near the edges of the flap.
Step 7.)
Carefully slide the envelope liner into your envelope, and once centered, press down to secure the liner in place.
Your invitations are ready to go! Don’t forget that you should address your envelopes before inserting the invitations. We recommend sealing the envelopes with an envelope moistener with adhesive to make sure they’re safe and secure.
You can change the colors of the pocket, belly band, and envelopes to create your own look, or keep everything in this recipe for a suite that’s already guaranteed to turn out great. Your guests are in for a treat when these one-of-a-kind invites arrive in their mailboxes.
Happy DIY-ing!
Save on Pinterest for later:


