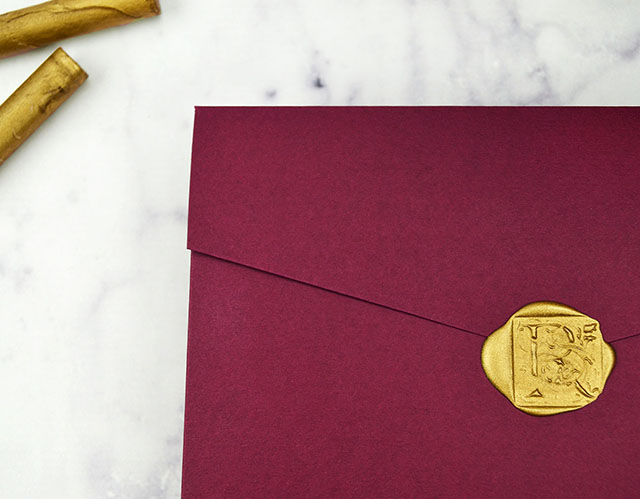
When it comes to wedding invitations, it’s all about the little details. Wax seals are a romantic and nostalgic detail that make a beautiful finishing touch on DIY wedding invitations. Although they may seem expensive, they’re surprisingly easy and affordable to do yourself!

Wax seals are a long time tradition. They were first used only by royalty in the Middle Ages to authenticate documents and issue decrees, but eventually became a common practice used by all. Since many couldn’t read or write, wax seals were used as a signature, which means everyone had their own unique seal.
Using wax seals on your wedding invitations today is a perfect way for you and your fiancé to add a unique and personal touch. Your wax seal can contain your last name initial, initials of your first name, or something specifically significant and custom for you.
Besides your wedding invitations, here’s what you’ll need:
![]()
- Sealing Wax – (3 pack for $6)
- Decorative Stamp – (ours range from $10 – 12)
- Wax Heat Gun ($12)

Each stick of sealing wax creates 8-15 impressions, depending on the size of your seal.
Shop Supplies:
Ready for assembly? To create your seals:
1.) Insert a wax stick in the heat gun, plug it in, and let it warm up for a few minutes. You may have to use two sticks to get it going. These heat guns are the same as hot glue guns, but it’s a good idea to have separate tools for each in order to not mix wax and glue.
2.) Place your stamper in ice – it makes it easier to remove from the hot wax if cold. Just make sure to dry off any excess water before using.
3.) After warming up the wax for a few minutes, test to see if your wax is ready to use on a piece of scrap paper by squeezing the trigger of the heat gun. If the wax begins to come out easily, you’re ready to start.
4.) Squeeze a small circle of wax where you want your seal to be, around the same size as your stamp’s design.
5.) Make sure your stamp design is facing the right direction, and gently press it into the dollop of sealing wax.
6.) Leave it in place for a few seconds without moving it, and gently lift to reveal your design.
 Gold Sealing Wax | Ornate Alphabet Seal | Signature Pocket in Bugundy
You can see the whole process in our video below, and how quick and easy this DIY is with the tools and method used:
We used wax seals to close a pocket invitation in this tutorial, but here are some other ways to incorporate wax seals in your wedding invitations:
• On Your Inner Envelopes
Use wax seals on inner envelopes rather than outer so that they’re protected during mailing. If using on envelopes, you can also create the wax seals on parchment paper first, then peel off and attach to your envelopes with adhesive once they’ve cooled. This will make it easier for your guests to open the envelopes without it ripping.
 Copper Sealing Wax | Celtic Knot Seal | A7 Inner Euro Flap Envelopes in Mist

• On a Bellyband Around Your Invitation Suite
 Pink Sealing Wax | Script Alphabet Seal | Standard Bellyband in Burgundy | A7 Euro Flap Envelope in Bubble Gum

• To Seal a Vellum Invitation Wrap
 Black Sealing Wax | Fleur de Lis Seal | Vellum Paper | Invitation Cardstock in Cipria

Tips for assembly and mailing:
• We recommend practicing your wax seals on extra envelopes or scrap paper before starting on your wedding invitations so that you can find just the right amount of wax to use, and perfect your stamping technique. 🙂
• To avoid the worry of having your wax seals come off of envelopes during mailing, use them on inner envelopes or pockets so that they’re secure inside your outer envelope.
• Make sure to visit your local post office and check with them first to make sure you will be able to mail your invitation with wax seals (before sealing all of them). Also, see if you can get your invitations hand cancelled to avoid a machine process.
• When it comes to mailing invitations with wax seals, you should also be aware that they may require extra postage, so factor that into your budget and check with your post office on how much postage you will need to mail each invitation.
Don’t be afraid to go bright and bold with less traditional wax seal colors like pink, orange, black, or turquoise!

Ready to get sealing? Take a look at our sealing wax colors and dream up your perfect wedding invitation. Your guests will be in for a treat when they find your special sealed invitations in their mailboxes.
Have any questions about DIY wax seals? Please leave them in the comments below!
Happy DIY-ing!
Save to Pinterest:


