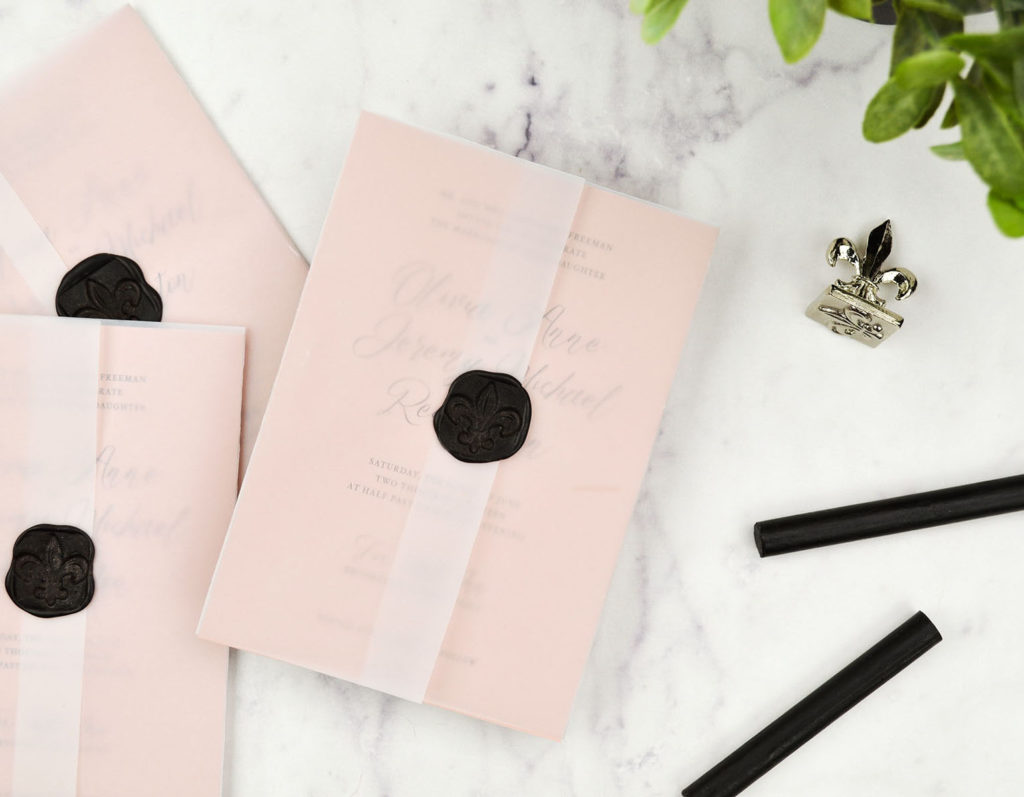
These beautiful, modern DIY wedding invitations are all about the details and perfect for a sophisticated wedding. We paired a classic invitation design in blush with a Vellum wrap and black Fleur de Lis wax seal for a combination that’s unexpected yet elegant. We finished off the suite with a matching blush RSVP card and Silver RSVP envelope.
Learn all of the materials needed and how to make your own at home.
![]()
- Invitation Design “Classic Cursive” on Cipria – $.53
- Inkjet Vellum paper – $.15 per sheet
- RSVP Card Design “Classic Cursive” (3.5 x 5″) on Cipria – $.41
- RSVP Envelope (Euro Flap – 3 5/8 x 5 1/8″) in Silver – $.18
- Black Sealing Wax (3 pack) – $6.00 (each stick will create 8-15 impressions, depending on the size of the seal)
- Wax Seal – Fleur de Lis Seal – $12.00
- Paper Trimmer
- Wax Seal Glue Gun – $12.00
DIY this suite at $1.27 per Invitation Set (not including wax, seal, or glue gun)
Shop This Post
1.) Start by choosing your invitation design. This can be something you design yourself, a template you purchase, or you can take a look at our wedding invitation templates. For this suite, we used an invitation card that’s 5 x 7″ and an RSVP card that’s 3.5 x 5″. We used our “Classic Cursive” design template for this suite.
2.) Print yourself at home using 8.5 x 11″ cardstock (we used Cipria for this design). You can also have your design printed at C&P through the “Print Your Own Design” section. (If you’d like the invitation printed on something that’s not standard, like Cipria, you can contact our customer service for a custom quote or leave the paper selection in the customer notes).

3.) Once you’ve ordered and received all of your materials and printed your invitations, start the assembly process by cutting them down to size (if not already cut) using a paper trimmer.
4.) Trim your Inkjet Vellum paper down to size as well. We trimmed just one side of this 8.5 x 11″ sheet down to 7 x 11″ so that it would be the same height as the 5×7″ invitation card. You’ll want to leave the 11″ length as is, so that there is an overlap when you wrap the vellum around the invitation card.
5.) Center your invitation on the Inkjet Vellum (the Vellum should be the same height as your invitation card) and carefully fold the sides of the Vellum over the invitation card, overlapping the Vellum in the front middle.
6.) Insert a wax stick in the wax glue gun, plug it in, and let it warm up for a few minutes. You may have to use two sticks to get it going. These heat guns are just like hot glue guns, but it’s a good idea to have separate tools for each in order to not mix wax and glue.
7.) Place your stamper in ice (it makes it easier to remove from the hot wax if cold). Just make sure to dry off any excess water before using.
8.) Test to see if your wax is ready to use on a piece of scrap paper by squeezing the trigger of the glue gun. If the wax begins to come out easily, you’re ready to start.
9.) Hold your Vellum securely folded around the invitation as you squeeze a small circle of wax, (around the same size as your stamp’s design), in the center of your invitation where the Vellum overlaps.
10.) Make sure your stamp design is facing the right direction, gently press it into the dollop of sealing wax, and leave it in place for a few seconds without moving it. Then gently lift to reveal your design.
11.) Place your RSVP card inside the RSVP envelope and carefully slide it underneath your beautifully sealed Vellum wrap (and on top of the invitation card).
You can see the whole process in our assembly video below!
Change up the invitation and RSVP card color, envelope colors, and wax seal color to fit your wedding color palette. You can also use a different invitation and RSVP card design with the same assembly methods for a completely different theme. The result will always be a beautiful DIY wedding invitation wrapped and sealed with love that you can be proud of!
Let us know if you have any questions in the comments below.
Happy DIY-ing!
Save to Pinterest:


