
Let’s face it…planning a wedding is not easy, and most definitely not cheap. Tack the word “wedding” onto anything, whether it’s a dress, venue, or even paper, and the dollar signs instantly multiply. But good news – Cards and Pockets is on team Budget Bride! We’re all about helping you save money and create DIY wedding invitations that are not only beautiful, but the best quality.
With the right supplies, you can easily DIY the wedding invitation of your dreams on a tight budget…and even have fun doing it. Sound good? Let’s get started.
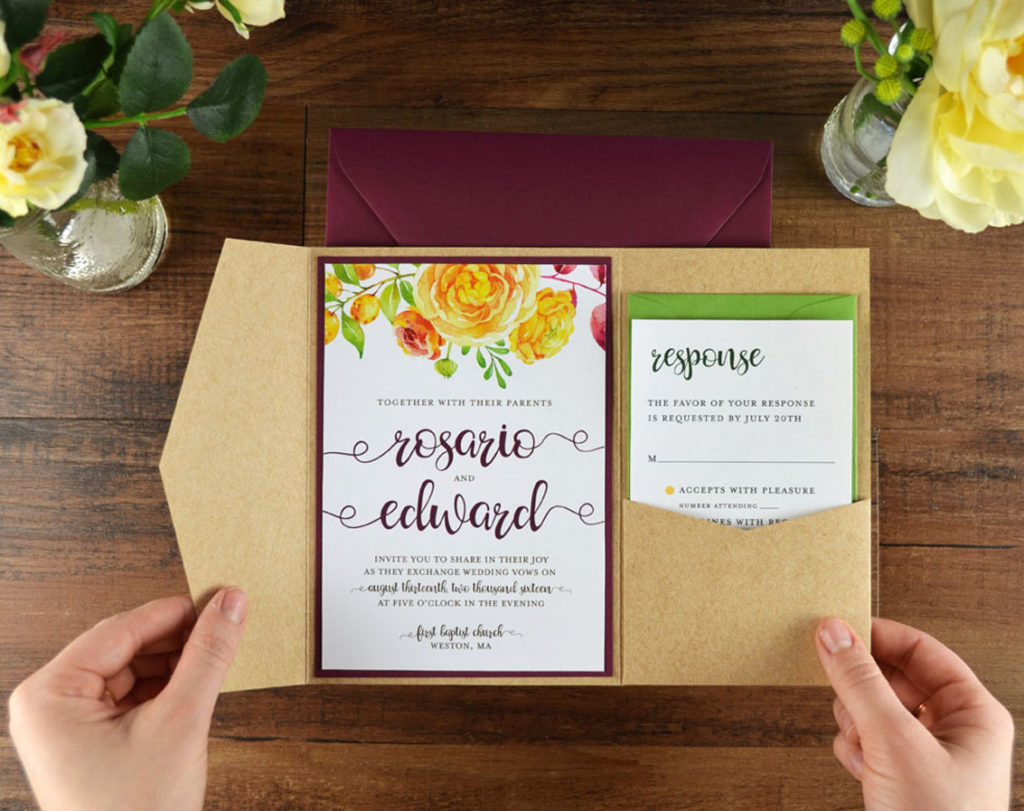
First things first. Here’s a breakdown of what you’ll need:
![]()
- Your invitation design
(we have lots of free wedding invitation templates that you can choose from) - Card stock for invitation and RSVP cards –
(25 pack pre-cut invitation cards for $5 )
(25 pack pre-cut RSVP cards for $4 ) - A7 Signature Pocket in Straw Kraft- ($.69 – $.80 each)
- A7 Mailing Envelope in Burgundy – ($.16 – $.23 each)
- RSVP Envelope in Gumdrop Green – ($.17 – $.18 each)
- Standard Invitation Mat, A7 style in Burgundy – ($.22 – $.35 each)
- Zip Dry Glue
- Envelope Moistener with Adhesive
Add that all up and it comes out to about $1.43 – $1.69 per invitation!
Shop This Post


Tip #1: It’s always a good idea to purchase a few extra of everything when DIY-ing…just in case. Plus, you’ll probably want to have a few extra invitations to keep, and for your wedding photographer to photograph.
Tip #2:You can also purchase a Pocket Invitation Kit to get everything you need in one place. So. Easy.
Step 1
You need your invitation design picked out and printed. Choosing a design is easier said than done, we know. Pick something that will give your guests a sneak peek into the feel of your big day, whether it’s using your color scheme or wedding theme (for example: rustic, 1920’s, vintage, country, elegant, romantic, etc.).
Already have a design? Perfect. Have no idea where to start? Take a look and pick out one of our free invitation templates that you can customize and download to print. We’re using the “Summer Bouquet” free template in this post.

Tip #3: If you don’t want to print your own invitations at home, C&P can do the printing work for you!
Step 2
Okay, once you have your design picked out and printed (phew), you can get down to business with assembly…time for mounting. You’re going to mount the invitation card to the invitation mat, and then the whole thing to the pocket. We recommend using Zip Dry Glue as your adhesive for this part.
Just run a thin line of glue near the edges of the invitation (about a quarter of an inch away), and a big “X” in the middle. Try not to use too much glue – although it dries clear, you don’t want that glue squishing up under the invite. Carefully center the invitation on the mat, and press down lightly along the edges. (Don’t be too hard on yourself if it’s not perfectly centered the first time – it takes some practice)!


Step 3
Do the same thing to glue the mounted invite to the center section of your pocket.


Guess what? Hard part = done.
Step 4
Now you’re just going to take your pre-printed RSVP card and RSVP envelope, stack them on top of each other (or you can tuck the RSVP card under the flap of the envelope), and slide them into the pocket. (Don’t forget, your RSVP envelope should already be addressed with your address).
If you have other inserts like Directions or Accommodations, you’ll neatly stack these behind the RSVP card before tucking them into your pocket.


Step 5
Fold up your pocket invitation and slide the whole thing into your mailing envelope.

Step 6
Seal the envelope. We’ve found that using this Envelope Moistener with Adhesive works well for making your envelope nice and secure (and saves you from having to lick every single one of your envelopes shut). You may want to have your envelopes pre-addressed before inserting the invitations if you’re matching up RSVP cards to names, or just to make sure they’re nice and flat while addressing.

Step 7
Repeat steps 2-6 for the remainder of your invitations.
Step 8
Breathe a sigh of relief. Do a happy dance. Admire those beautiful budget invites that you created, and check that one off your wedding to-do list.
Of course, there are so many other ways that you can dress up and customize your invite even further – like using bellybands to wrap around your folded pocket, envelope liners to add a fun surprise when your invite is opened, double envelopes if you want to get a little bit fancier, laser-cut elements…the possibilities are literally endless. But even this basic pocket invite is sure to impress your guests!

Alright, friend. You might have been stressing about this part of your planning, but hopefully now you see how easy it is to DIY beautiful, high quality, (and still cheap) wedding invitations. And the best part is, your wedding guests will never even know. We’ll keep that little secret between you, us, and your bank account 😉
Now go pick out your favorite free invitation template and get started! Happy DIY-ing!
Save on Pinterest for later:
