
— Chelsea —
![]()
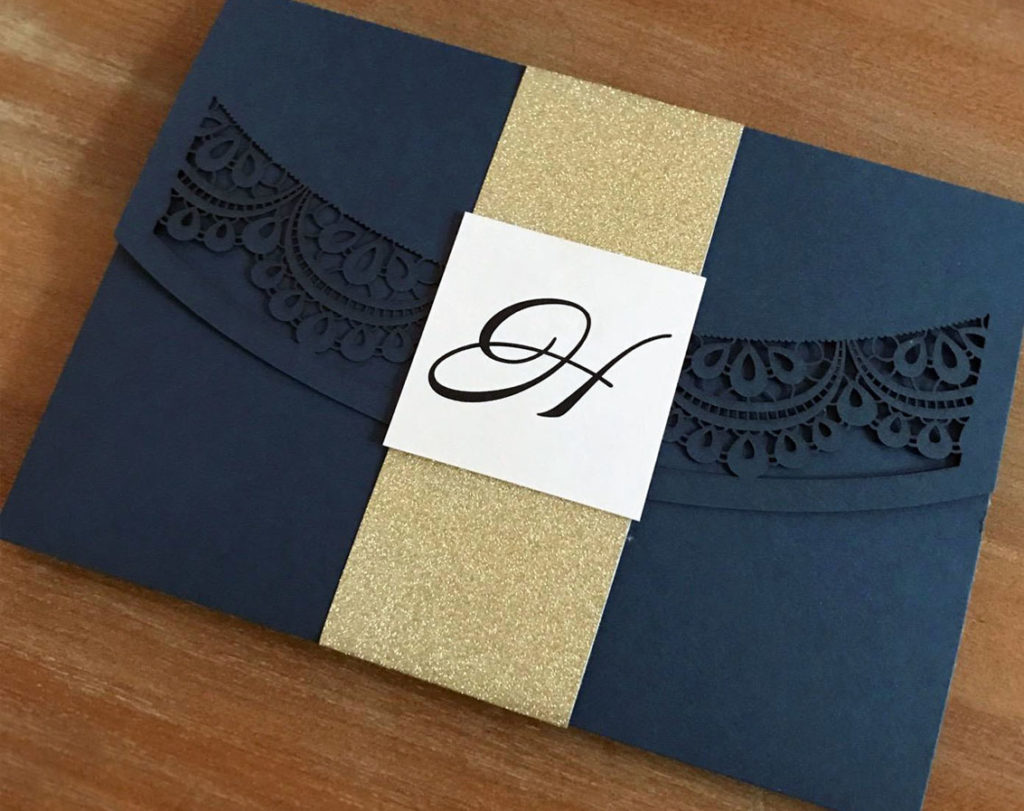
I’m having a “white attire” beach wedding with navy accents so that was my inspiration for the invitations. All white doesn’t really work for invites, so I pulled much more heavily on the navy and gold accents to “jazz” them up. I wanted the invitations to be clean, but fancy at the same time. I ended up using white, two navy tones, and gold glitter to achieve my dream invites!
![]()
- Lace Doily Laser Pocket in Cobalt
- 5×7 Panel Card in Glitter Gold
- A7 Style Pattern Invitation Mat – “Swirls” pattern in Imperial Blue
- Print Your Own Pocket Set (Invitation and Inserts) on White
- Standard Belly Band in Glitter Gold
- Print Your Own 2″x 2″ Monogram on White
- A7 Envelope (Square Flap) in Imperial Blue
- RSVP Lined Envelope (Square Flap) in Snow White /
Envelope Liner Pattern “Swirls” in Imperial Blue
Shop This Post


I used so many layers to achieve the look I wanted. I ended up using the lace doily pocket invites, but really personalized them by gluing gold glitter cards to the inside. I also layered the custom pattern cards on top of the gold glitter before I even got to the invites themselves. I used the layered pocket inserts to convey a ton of information about the wedding and location to our guests since a destination wedding can be so complicated. It was the perfect way to invite our guests.
- Rubber Cement
- Hot Glue Gun
- Custom Address Stamp
I did the paper layering with rubber cement, secured the belly bands with hot glue, and used a custom stamp for our return address.

![]()
I’ve got to be honest, these invitations were a ton of work (my own fault).
1.) I individually rubber cemented the gold cards to the inside for the main invite, and in the back of the invitation pockets. Because I had many layers to go, I placed each invite under a heavy book after this step to dry flat.
2.) I then layered the patterned navy and white cards on top of the main invite side, eyeballing to make sure they were centered. Again, rubber cement and heavy books to dry. Over and over again.
3.) Finally I glued the actual invite on top of the gold glitter and patterned paper. Heavy books to dry once again.
4.) Then I assembled each set of information cards and placed them in the pockets. I addressed each RSVP card to the invitees before inserting them.
 5.) I secured each invitation with a gold belly band and monogram using hot glue.
6.) I then used my personalized stamp and gold ink to address each of the RSVP envelopes, adhered a stamp to each one, and slid it into the belly band in the back of the invitation.
7.) Lastly, I stamped the back of each exterior envelope, used a gold Sharpie to address the fronts, and adhered two stamps to send (these babies were heavy after all of that).

![]()
I would say, try to recruit some help and do an assembly line! These were a ton of work for just one girl to do! However, the feeling of finishing them was incredibly rewarding because I did them all myself and I’m very proud of them.

Congratulations, Chelsea! Thank you for sharing your DIY Story with us!
Save to Pinterest:

![]()
At Cards & Pockets we love DIYers. We also know that one of the best ways to be inspired is to see and learn about other people’s experiences. We’re excited to share stories of our customers unique DIY invitation process.
Do you have a unique DIY story for your invitations? We would love to hear more about it. Simply visit our “My DIY Story” entry page and fill out the submission form and you could be selected for our next featured story!
Be an inspiration, share your story today!