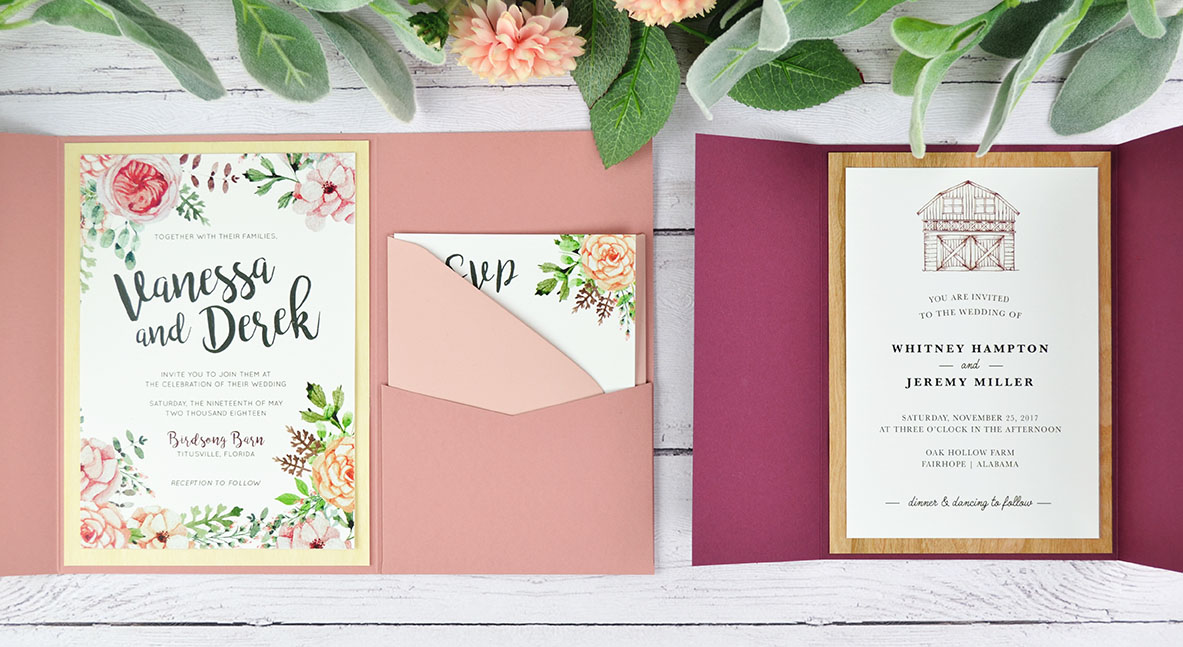
 If you’re planning an elegant-rustic affair and have been searching Pinterest boards day and night for the perfect rustic wedding invitation, allow us to introduce you to our new real wood paper. (Yes, it’s actually made from wood)! Wood paper is the perfect match for a rustic barn wedding, a dreamy woodland wedding in the great outdoors, or for the adventurous couple seeking something different for their DIY wedding invitations.
This lightweight wood veneer is thin enough to fold, trim, and run through a printer, and is full of beautiful, organic woodgrain texture. Add just a touch for a little bit of rustic charm, or multiple wood paper elements for a truly earthy invitation suite. Here’s how you can add Cherry or Birch wood paper to your DIY wedding invitations!
1.) Wood Belly Bands
A belly band is both stylish and functional. It dresses up your suite and at the same time, holds your invitation and inserts neatly together. You can also wrap a belly band around a folded pocket invitation to keep it tightly closed. A wood paper belly band adds a raw, rustic element to your invitation suite, making it a real statement piece. As with all belly bands, you only have two folds and one shot to get it right!

To apply: Lay the wood belly band on top of your invitation card so that it’s straight and centered. Once you have it just right, carefully fold one side of the wood paper back behind the invitation card, pressing between two fingers to get a nice, clean fold.
Flip the invitation over, pull the loose side of the belly band so that it’s tight in the front, and line up with the side that’s already folded in the back. Fold against the side of the invitation card, and secure with tape or a Glue Dot for a secure seal.
 Pictured: Invitation on Snow White; Cherry Wood Belly Band & Envelope Liner; Invitation Mat & A7 Envelope in Mid Green
2.) Wood Envelope Liners

An envelope liner is one detail that takes your wedding invitation to the next level. An envelope liner made of real wood really kicks it up a notch!

To mount your your envelope liner, use a tape dispenser to place a line of adhesive just near the edges of the flap. Slide the liner into the envelope, being careful not to let the adhesive touch the envelope until it’s in place. Once in the envelope and centered, press down firmly where you placed your adhesive. Carefully fold along the envelope’s existing fold line. Instant rustic charm added to your invitation.
 Pictured: Invitation on Snow White; Invitation Mat & Envelope Liner in Cherry Wood; Gate Card & RSVP Envelope in Burgundy
3.) Wood Invitation Mats

For an understated but beautiful embellishment, mount your invitation card to a wood paper invitation mat. The woodgrain border adds an earthy feel to your invitation. To attach your invitation card to the mat, use a tape dispenser to apply a line of tape near the edges and across the middle of your invitation card. Center on the wood paper (woodgrain side up) and press down firmly to secure.

You can leave as is, dress up with a belly band, twine, lace, etc., or mount the wood mat and invitation to a pocket or other base card.
 Pictured: Invitation on Snow White; Invitation Mat in Birch Wood; Signature Plus Pocket in Dusty Rose; A2 RSVP Envelope in Cipria
3.) Wood Invitation Cards

Pictured left: Invitation printed on Birch Wood Paper; Signature Pocket in Jellybean Green
Print your invitation design directly onto wood paper for a big statement and tons of texture. The wood grain shows through your invitation design and amplifies the rustic feel. We recommend ordering samples of wood paper to test on your home printer if you plan on printing yourself.
The wood invitation will need to be mounted to an invitation mat, pocket, or other base card for support, as this is a thin wood veneer that’s similar to text weight paper. Combine any of the above wood embellishments for a deeply woodsy suite.
 Pictured: Invitation on Cherry Wood; Invitation Mat in Shadow; A7 Envelope in Mid Green
You can order wood paper samples in Cherry or Birch here and start creating the rustic wedding invitations of your DIY dreams! Get creative; pair wood paper accessories with pockets, envelopes, and other paper goods in over 80 colors for a suite that’s uniquely you.
Happy DIY-ing!
Save to Pinterest:


