 Photo by Tina Elizabeth Photography
![]()
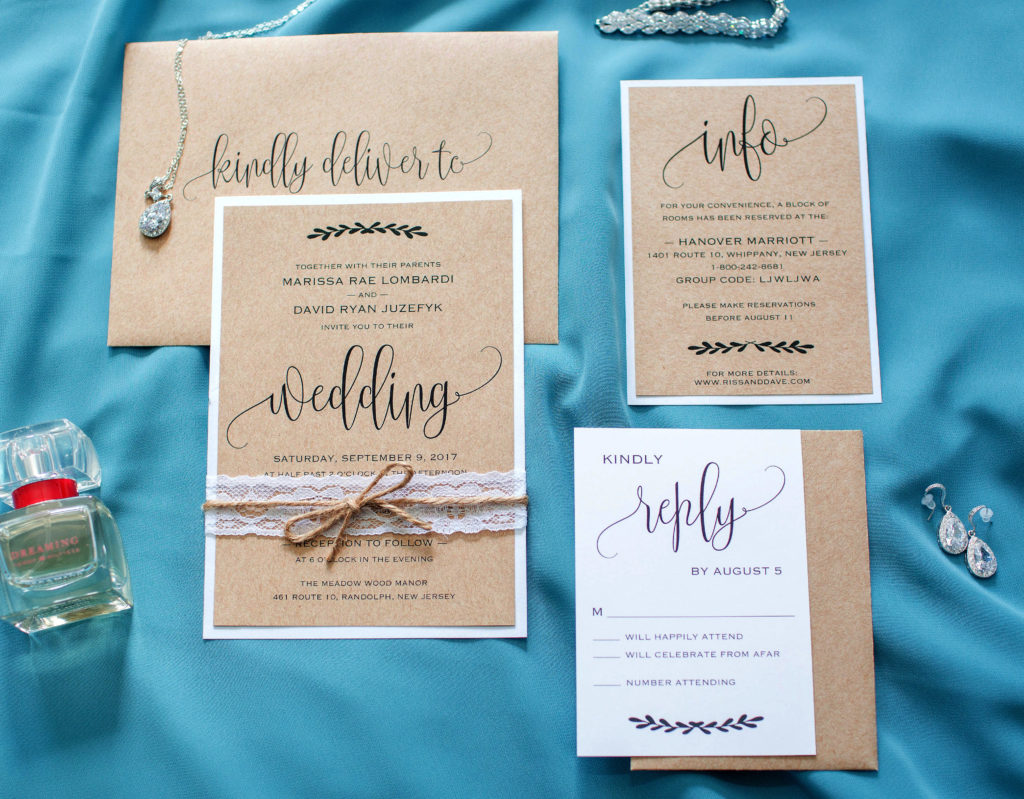
As a graphic designer, I knew I wanted to design my own wedding invitations and stationery to match the modern rustic theme of our wedding. I fell in love with a font called Braveheart – a modern spin on classic calligraphy. I based my whole design around this very unique font.
I chose kraft paper as the primary color for my stationery, keeping with our rustic theme. Cards & Pockets had the perfect shade of straw kraft paper, which stood out beautifully against a white mat.

— Marissa —
After designing and printing everything myself, I recruited the help of my family in assembling my invitations! We created our own assembly line around the dining room table, each person carefully working on one piece at a time. It was a fun moment for us during the chaos of wedding planning!
![]()
- Cardstock in Straw Kraft
- Cardstock in White (see our cardstock here)
- A7 Mailing Euro Flap Envelope in Straw Kraft
- RSVP Euro Flap Envelope in Straw Kraft
- Lace
- Twine
- Stamps

Shop This Post


![]()
- Glue Dots
- Double-sided Tape (see our adhesives here)
- Envelope Moistener with Adhesive
- Home Printer
- Paper Trimmer
- Ruler
I printed everything myself on an HP photosmart printer. I used an old, but trusty paper slicer to cut the card stock after printing. A ruler was crucial in making sure my dimensions were correct. I used glue dots to matte the invitations and double-sided tape to secure the lace. An envelope moistener also came in handy when sealing envelopes.
![]()
1.) Print main invitation, response, and info cards on 8.5×11″ card stock. Print addresses on A7 and RSVP envelopes.
2.) Cut printed invitation (5×7″), response card (3.5×5″), and info cards (3.5×5″) using a paper slicer.
3.) Mount invitations and info cards to backing using glue dots. This takes steady hands and lots of patience!
4.) Cut lace and twine. Wrap lace around invitations, open to the back. Use double-sided tape to secure lace. Wrap twine around invitations, over the lace, tying a bow in the front.
5.) Slide info card and response card, along with RSVP envelope underneath lace/twine.
6.) Apply stamps to A7 and RSVP envelopes.
7.) Stuff each A7 envelope with entire invitation suite.
8.) Seal envelope using an envelope moistener.

![]()
* Test everything ahead of time! I ordered samples from Cards and Pockets so I could run test prints through my printer and see the final result before ordering everything. This also ensured a smooth assembly process, since I had already tried it out a few times.
* Order more paper/envelopes than you need! There will be mess-ups, so have extra supplies on hand so you don’t run out.
* Be sure to weigh the final product (envelope and all) at the post office BEFORE buying postage! You may need more or less postage than you realize.
* I used a blacklight marker from Amazon to mark each guest’s name on the back of the response card. It writes in invisible ink and only shows up with a blacklight! Just in case you can’t read someone’s handwriting or they forget to sign their full name when responding.
 Photo by Tina Elizabeth Photography
Congratulations, Marissa & David! Thank you for sharing your DIY Story with us!
Save to Pinterest:

![]()
At Cards & Pockets, we love DIYers. We also know that one of the best ways to be inspired is to see and learn about other people’s experiences. We’re excited to share stories of our customers unique DIY invitation process.
Do you have a unique DIY story for your invitations? We would love to hear more about it. Simply visit our “My DIY Story” entry page and fill out the submission form and you could be selected for our next featured story!
Be an inspiration, share your story today!