
— Alexandra’s Story —
![]()
All of the paper products that go hand-in-hand with the wedding was the one thing I was most excited to start after we got engaged! Of course I had ideas saved on my Pinterest board, but both myself and my fiance work in the creative field so I knew this would be a project that we would work on together. We wanted a simple but elegant design that reflected our style, nothing too formal or traditional.
My fiance and I worked together to design and illustrate the emblem of our initials. Once we had everything designed, I worked on the layout and after many drafts we finally came to the best font, design, and copy combo! Who knew how hard the wording would be on wedding invites!
![]()
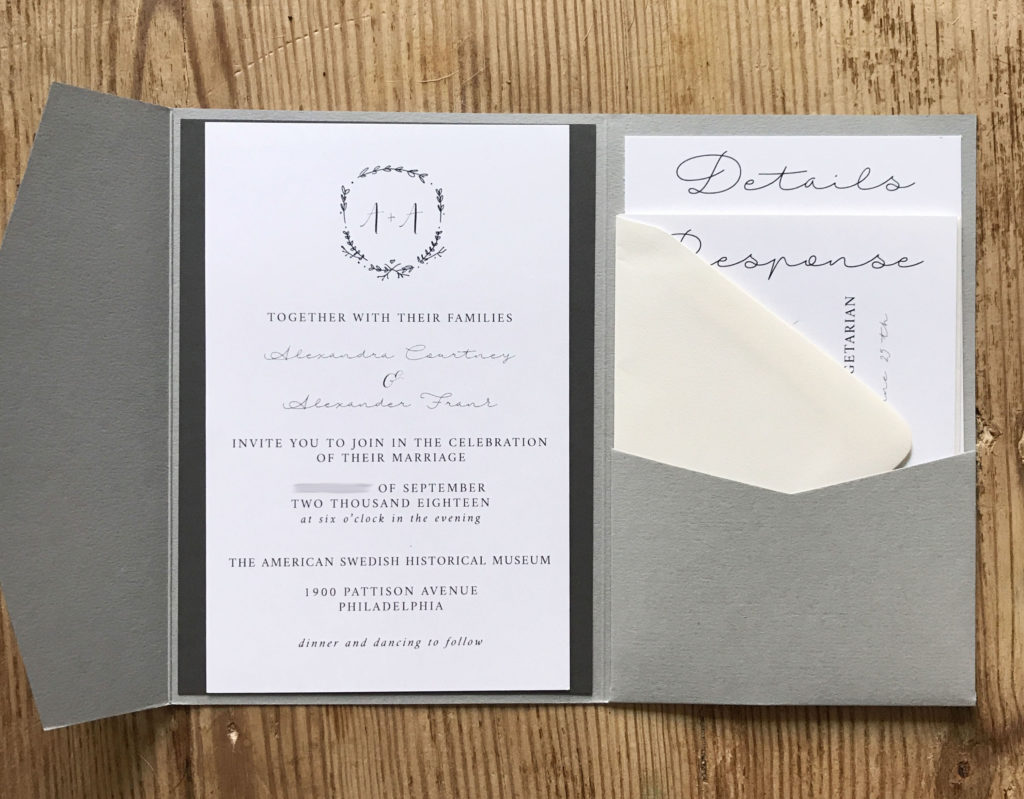
Signature Plus Pocket Invitation Kit:
- Signature Plus Pocket in Real Grey
- A+ Envelope in Cream Puff
- A2 (RSVP) Envelope in Cream Puff
- Invitation Mat (5.25 x 7.25) in Dark Grey
- Printed Invitation Set (see ours here)

After our initial sketches, I created everything in Photoshop and InDesign, then we ordered all of our paper and envelopes from Cards and Pockets. The rubber “R” wax seal stickers were the perfect final touch, these were ordered from waxseals.com.
Shop This Post


![]()
Everything was made by hand! We used paper cutters to trim the edges, computers and printers for the invites.
• Paper trimmer
• Printer
• Double-sided tape (see adhesives here)
![]()
1.) Created piles of the different pieces of the invitations, including the formal invite, the details card, RSVP card, and envelope.
2.) First we went through and used double-sided tape to adhere the main invite to the inside of the pocket folder.

3.) Before inserting the details card (5×7), I trimmed 1/2″ off either side so it would line up with the RSVP card (4×6). Then I inserted all of the details cards into the pockets.

4.) We stamped all of the RSVP envelopes with our return address stamp (purchased from Etsy), and placed the postage stamps.
5.) Before slipping the RSVP card under the flap of the RSVP envelope, we labeled each card with a number that aligned with our mailing list – just in case people forget to write their names on the M______ line. (I guess it’s a thing that happens).
6.) Once the RSVP’s were labeled, we kept them in organized piles so we were sure they would be in line with address labels on the outside envelopes. I kept the invites in groups of 15. Once the RSVP’s were labeled, we kept them organize

7.) We sealed the pocket folder with a rubber wax “R” seal, which was purchased from waxseals.com.
8.) We printed the address labels ourselves at home and we placed them on the envelopes with the final postage (be sure to make sure you have the right postage at the post office before sticking them on!)

![]()
- Organization is absolutely KEY! if you have all of your supplies prepped before assembling, it makes the process a lot easier.
- Get some friends/family together to help you too!

Congratulations, Alexandra and Alexander!
Thank you for sharing your DIY Story with us!
Save to Pinterest:

![]()
At Cards & Pockets, we love DIYers. We also know that one of the best ways to be inspired is to see and learn about other people’s experiences. We’re excited to share stories of our customers unique DIY invitation process.
Do you have a unique DIY story for your invitations? We would love to hear more about it. Simply visit our “My DIY Story” entry page and fill out the submission form and you could be selected for our next featured story!
Be an inspiration, share your story today!